

Last Updated: September 8, 2026
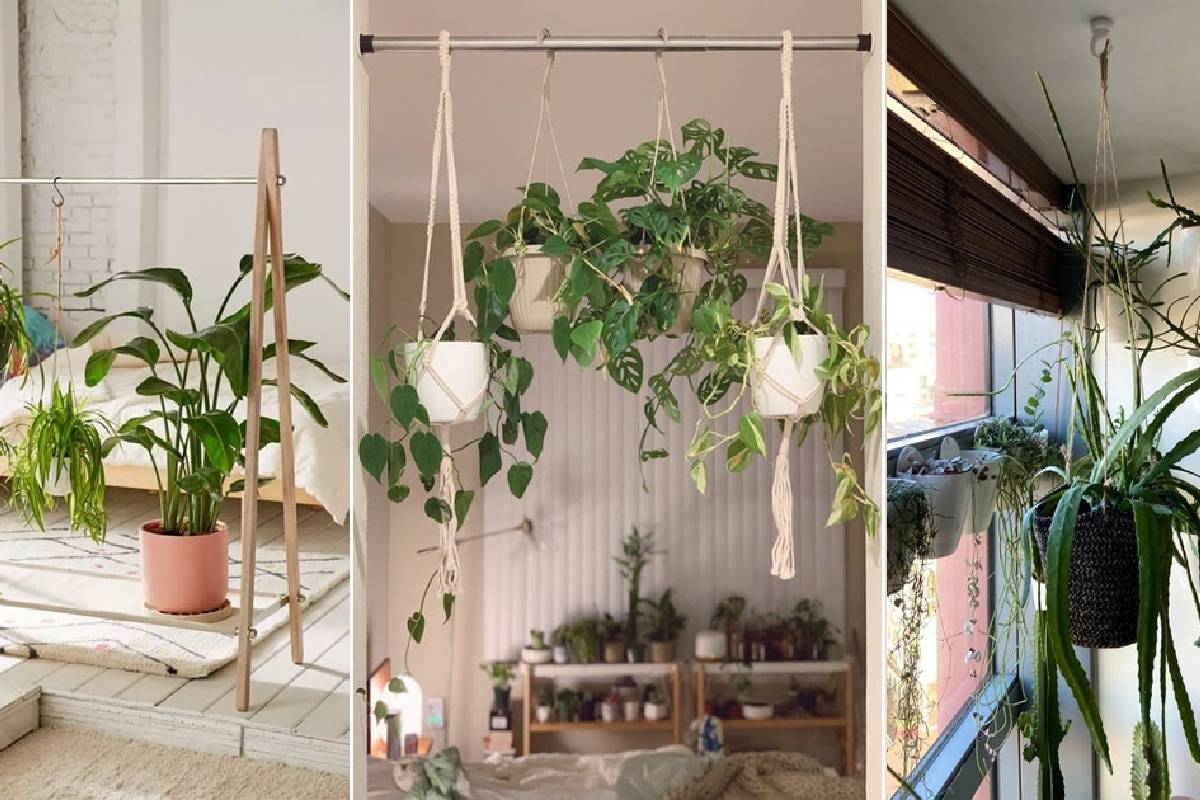
Hanging plants can add natural beauty to a covered porch, patio, balcony, or indoor living space. They are especially useful in rooms where floor space is limited, allowing you to bring greenery into your home without taking up valuable surfaces.
If you’re also refreshing your home’s interior, a carefully chosen ceiling and wall colour can complement hanging greenery beautifully. For example, you can see how a dove gray paint can create a calm backdrop for plants and other decorative elements.
To turn a plant into a hanging feature, you need a secure way to attach it to the ceiling. A swag hook is designed for this purpose. These heavy-duty hooks can support a hanging planter when properly installed, but the exact weight capacity depends on the hook and mounting method you choose.
The installation itself is relatively simple and requires only a few basic tools. With the right hook, proper ceiling support, and a suitable plant, you can create an attractive vertical garden without using valuable floor space.
This Article Belongs to Healthy Lifestyle
Table of Contents
BEFORE YOU START
Whenever you hang something from a ceiling, safety should be your first priority. This applies to light fixtures, ceiling fans, storage systems, and hanging plants.
A potted plant may look lightweight, but the combination of the container, soil, water, and plant can make it surprisingly heavy. A hanging plant that falls could damage flooring or furniture and, more importantly, could injure someone underneath it.
Before installing your hook, check its weight rating and compare it with the fully watered weight of your plant and planter.
The mounting surface is equally important. If you can attach the hook directly to a ceiling joist or suitable beam, that is generally preferable. If the hook must be installed into hollow drywall or plaster, use an appropriate toggle bolt or other fastening system designed for the ceiling material.
You should also think about what is underneath the plant. Avoid positioning a heavy hanging planter directly above seating areas, walkways, beds, or other places where someone could be standing or sitting.
TOOLS AND MATERIALS
Before starting the project, gather the following:
- Swag hook with toggle bolt, if required
- Step ladder
- Stud finder
- Power drill
- 1/2-inch drill bit, if using a toggle bolt
- Drill bit that matches the screw shank, if mounting directly into a stud or beam
- Hanging plant
- Plant chain or rope
- Chain extender or S-hook, if additional length is needed
If you’re working on several home-improvement projects at the same time, it can be helpful to organise your tools and supplies before beginning. For example, homeowners tackling other projects such as removing bike rust may already have many of the basic tools needed for this installation.
STEP 1: Choose the Right Location
The first step is deciding where you want the hanging plant to go.
Look for an area that provides enough natural light for the plant you intend to grow. Some plants need bright, indirect light, while others can tolerate lower-light conditions.
Also consider how much space the plant will need as it grows. Trailing plants can eventually extend well beyond the original pot, so leave enough clearance around furniture, doors, windows, and walkways.
For outdoor installations, a covered porch or patio can be an excellent location. Just make sure the ceiling material and mounting point are strong enough to support the planter.
Hanging plants can also complement seasonal decorations. If you decorate your porch throughout the year, you can coordinate the greenery with ideas such as Christmas decorations or other seasonal displays.
STEP 2: Select the Right Swag Hook
Once you’ve chosen the location, select a hook that can safely support the plant.
Before buying a hook, consider the total weight of:
- The plant
- The pot or basket
- The soil
- Water
- Any hanging chain or hardware
Remember that wet soil can be considerably heavier than dry soil. It is therefore better to choose a hook with a weight capacity comfortably above the actual weight of your completed planter.
The type of ceiling also matters. If you’re mounting directly into a joist or beam, you can use a hook designed for direct fastening. If you’re mounting into hollow drywall or plaster, choose a suitable toggle-bolt system.
Avoid relying on an ordinary lightweight wall anchor for a heavy ceiling-mounted planter unless it is specifically rated for that application.
STEP 3: Locate a Joist or Suitable Support
Use a stud finder to determine whether there is a ceiling joist where you want to install the hook.
A joist provides a much stronger mounting point than unsupported drywall. Once you locate the joist, mark the exact position where you want the hook installed.
If no joist is available in the desired location, don’t simply screw the hook into the drywall. Instead, use a ceiling-rated toggle bolt or another appropriate anchor designed for the weight you intend to support.
This is particularly important for larger planters.
STEP 4: Drill the Required Hole
The drilling method depends on your mounting surface.
If you’re installing the hook directly into a joist or beam, use a drill bit that matches the diameter of the hook’s screw shank. Drill a suitable pilot hole without making it excessively large.
For a toggle bolt installed through hollow drywall, use the drill-bit size specified by the manufacturer. Many toggle systems require a hole around 1/2 inch, but you should always follow the instructions supplied with the particular fastener.
Take care when drilling into a ceiling. Check for possible electrical wiring, plumbing, or other hidden services before making the hole.
STEP 5: Install the Swag Hook
If you’re mounting the hook into hollow drywall, insert the toggle bolt through the drilled opening according to the manufacturer’s instructions. Once the toggle opens behind the ceiling surface, tighten the hook until it sits firmly against the ceiling.
If you’re mounting into a joist or beam, position the pointed screw end of the hook over the pilot hole and turn it clockwise until the hook is securely seated.
Do not overtighten the hook, as excessive force can damage the ceiling material or fastening point.
After installation, gently test the hook before placing your plant on it. If there is movement, looseness, cracking, or damage around the mounting point, stop and correct the installation before hanging the planter.
STEP 6: Hang Your Plant
Once the hook is securely installed, attach the plant’s chain, rope, or hanging mechanism to the hook.
Lift the plant carefully and make sure the hanging hardware is properly seated inside the hook.
Step back and check the plant from different angles. Make sure it isn’t swinging into walls, windows, doors, ceiling fans, or other objects.
If the plant hangs too high, you can use a suitable chain extender or S-hook to lower it.
STEP 7: Check the Plant After Watering
One important detail that is easy to overlook is the extra weight created by watering.
After watering your plant, check the hook and ceiling connection periodically, particularly during the first few weeks after installation.
Look for:
- A loose hook
- Cracks around the mounting point
- Sagging drywall
- Damaged chain or rope
- A planter that is becoming unstable
If you notice any of these problems, remove the plant and repair the mounting system before using it again.
How to Make Hanging Plants Part of Your Home Decor
Hanging plants don’t have to be purely functional. They can become an important part of your home’s overall decorating scheme.
You can combine hanging plants with wall decorations, wreaths, artwork, and seasonal accessories. If you’re interested in decorating with wreaths, you can also explore wreath ideas and inspiration to create a more coordinated look.
For homes with limited floor space, ceiling-mounted plants can be especially useful. Instead of filling every available corner with pots, you can use vertical space to create layers of greenery.
You can also combine hanging plants with other indoor plant arrangements. For example, indoor flowering plants can add colour and variety alongside trailing greenery.
Choose Plants That Suit Your Space
The best hanging plant depends on your available light, temperature, humidity, and how much maintenance you’re willing to provide.
Trailing plants can work particularly well because their foliage naturally grows downward from the container.
Before choosing a plant, consider:
- How much sunlight the location receives
- How frequently the plant needs watering
- How large it will become
- Whether it is suitable for indoor or outdoor conditions
- Whether pets or children can reach it
- How heavy the plant will become when fully watered
Don’t choose a plant simply because it looks attractive. Make sure the ceiling hook and planter can safely support it as it matures.
Keep Watering in Mind
Watering is one of the biggest practical concerns with hanging plants.
A planter that leaks can leave water stains on walls, floors, furniture, and outdoor surfaces. Before hanging a plant indoors, make sure the container is appropriate for the location and doesn’t allow excessive water to drip onto the area below.
For outdoor hanging plants, make sure drainage won’t damage the surface underneath.
If you’re already working on home maintenance projects, keeping the surrounding area clean and protected can prevent small problems from becoming larger repairs. For more home-related information, you can also explore Home Hearted.
Hanging Plants on a Porch or Patio
A covered porch or patio can be an excellent place for hanging plants because the plants can add greenery without occupying floor space.
When installing a planter outdoors, however, consider wind and weather.
A lightweight hanging basket can swing considerably during strong winds. Make sure the hook, chain, and mounting point are all appropriate for outdoor conditions.
You should also check the planter regularly for rust, corrosion, cracking, or other damage.
If you’re combining plants with outdoor decorations, make sure the overall arrangement doesn’t obstruct walkways or create a hazard.
Common Mistakes to Avoid
Using the Wrong Hook
Never choose a hook simply because it looks strong enough. Check its stated weight capacity and make sure it is suitable for your ceiling material.
Ignoring the Weight of Wet Soil
A plant can become significantly heavier after watering. Always consider the fully watered weight when selecting your hardware.
Mounting Into Unsupported Drywall
A screw installed directly into unsupported drywall may not provide enough strength for a heavy hanging planter. Use an appropriate ceiling-rated anchor when a joist isn’t available.
Hanging Plants Too Close to People
Avoid placing heavy planters over areas where people regularly sit, sleep, or walk.
Forgetting About Plant Growth
A small plant can eventually become a large, trailing plant. Leave enough space for future growth.
Failing to Check the Hardware
Inspect the hook, chain, rope, and planter periodically. Replace anything that becomes worn, rusty, cracked, or loose.
Final Thoughts
Learning how to hang plants from the ceiling is a relatively simple way to add greenery while making better use of vertical space.
The key is not just choosing an attractive plant. You also need the right hook, a suitable mounting point, a properly rated fastener, and a planter that can be safely supported.
Before installation, consider the plant’s mature size, the weight of wet soil, the condition of the ceiling, and the people or furniture below it. Taking a few extra minutes to plan the installation can help prevent damage and make your hanging garden safer.
For additional home-improvement guidance, you can also refer to Bob Vila’s original guide to hanging plants from the ceiling, which was written by Tony Carrick and updated September 9, 2021.